Since the population is growing, customers on Amazon are also increasing, so sellers have multiple opportunities to start their e-commerce businesses. One can start their e-commerce business by making their Amazon seller accounts. Mainly, due to Covid-19, people started preferring online shopping more. That is why learning how to create an Amazon seller account has become a necessity.
The previous year, most shoppers searched on Amazon for products with low prices or free or lower shipping charges. People are choosing online shopping to shop from the comfort of their homes and buy products at low prices compared to in-store shopping.
Besides, more than half of consumers like to shop on Amazon weekly or more, and towards the new year near Christmas because of amazing offers. Considering these facts, it is avid that there is a lot of potential for e-commerce entrepreneurs in upcoming years so learn how to be an Amazon seller.
Hence, if you want to be an e-commerce entrepreneur on Amazon, you need to create an Amazon business account. We will guide you by elaborating on creating an Amazon seller account in 2023.
How To Start An Amazon Business Easily?
The fantastic thing about Amazon is there are different ways to start an Amazon business easily. Kindly follow these steps to set up an Amazon account and learn how to become an Amazon seller.
1. Decide Which Business Model You Want To Opt For Before Creating An Amazon Seller Account
A private label is a business model in which a retailer rebrands or renames a product already produced by its brand or label.
Wholesale is a type of business model in which we buy products in bulk at low-cost or discount to sell as individual products in a retail marketplace.
Online or Retail Arbitrage is a business model in which we look for low-cost or discount goods on e-commerce sites or brick-and-mortar retail stores, so you can resell them online.
Dropshipping is a business model in which an Amazon seller does not keep their product inventory and transfers their customers’ orders directly to its manufacturer or supplier.
Handmade sellers make and sell their products on the Amazon marketplace, like jewelry or home decoration products.
2. Decide A Fulfillment Method
There are two fulfillment methods, Fulfillment by Amazon (FBA) and Fulfillment by Merchant (FBM). Both the models FBA and FBM have pros and cons, so choose carefully.
3. Choose Products To Sell
Choose a product that has demand on Amazon.
4. Apply For Amazon Seller Account To Create An Amazon Sellers Account
While you apply for Amazon Sellers Account, make sure to complete the Amazon seller registration process.
5. Begin Finding A Source For Your Products
If you opted for the private label business model, find a manufacturer to create your product.
6. Work On Your Product Listing
Work on your product listing because this is how you can grow your Amazon sales.
How To Set Up Amazon Seller Account?
Have you finalized what you are going to sell on Amazon? If the answer is yes, then go through the Amazon seller registration process to set up an Amazon seller account.
1. Open Google And Go To https://services.amazon.com

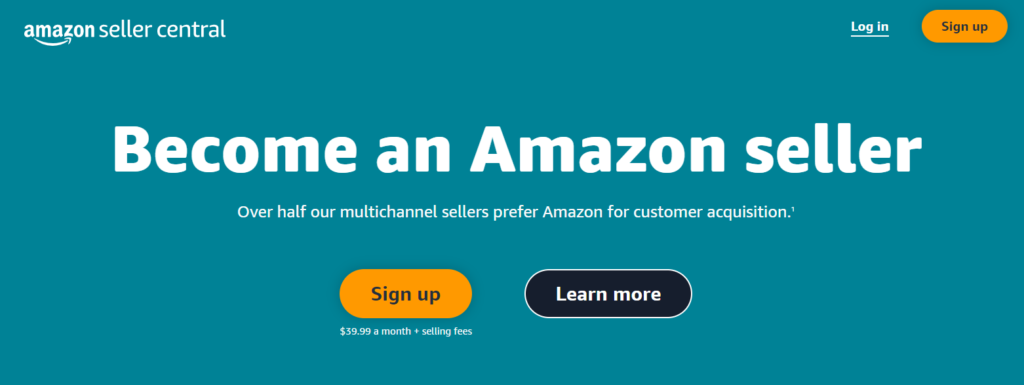
2. Afterwards, Click On the “Learn More” Option
Go to the “Pricing” tab and select the “Compare selling plans” option. This option will take you to a comparison page. On the comparison page, you can see the differences between individual and professional seller accounts.
Therefore, if you click the orange “Sign up” button, you will reach the registration page for a professional seller. But with the “see pricing” link, you will see the difference between the individual and professional accounts. Select either individual or professional account and register yourself.

3. Select Between An Individual Or Professional Seller Account
Since if you want to sell more than forty products monthly, sign up as a professional seller account. Whereas, if you sell less than forty products, select the individual plan, but remember, with this plan, you can not advertise your products on Amazon.

4. Enter Your Email And Select “Create A New Account”
When you choose the seller plan, a window appears asking for your email address and a password for your account. Set your password and click the “Next” button. Then a notification appears asking you to verify your email by opening an email sent to you. Open your mailbox and confirm your business amazon account.

5. Select Your “Business Location” And “Business Type”
Business location means the country where your business is, so select accurately. Business type means choosing a business entity among options like state-owned business, publicly-owned business, privately-owned business, No I am an individual and charity.
Most businesses are privately-owned, but if you don’t have a company formed yet, it will fall in the “No, I am an individual” category. You must enter your full name and click on the “Agree and continue” button.

6. Putting Your Personal Information
You need to give your personal information for Amazon seller account creation. For example, your passport number or driver’s license for identification. Enter your correct address as Amazon sends you a presto card verification number. It would help if you had that, as it will be an Amazon seller account login.
If you want to change your residential address, search for how to change your residential address on Amazon. Give your phone number for verification, and after entering everything, click on the “Next” option at the bottom of your screen.

7. Give Your Billing Information
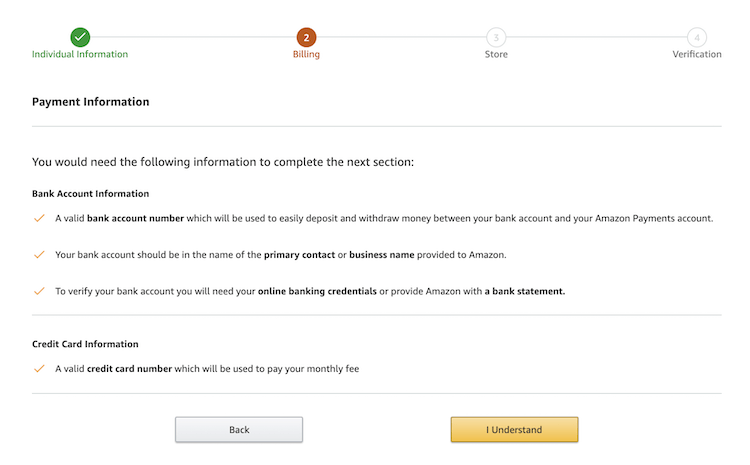
Your billing information includes a valid bank account and card number. After that, click on “I understand”, and on the next page, Amazon will ask you to verify your bank account. After that, enter your credit card details.

8. Give Information For Your Products And Amazon Store
If you have, you need to answer a few questions for opening an Amazon store, like the name of your store and UPCs for your products. However, if you are a manufacturer or brand owner of the product you sell, click “Yes” or “Some of them”. The question will be: Do you own a government-registered trademark for the branded products you sell on Amazon?” Then click on the “next” button after providing the information.

9. Verification Of Identity
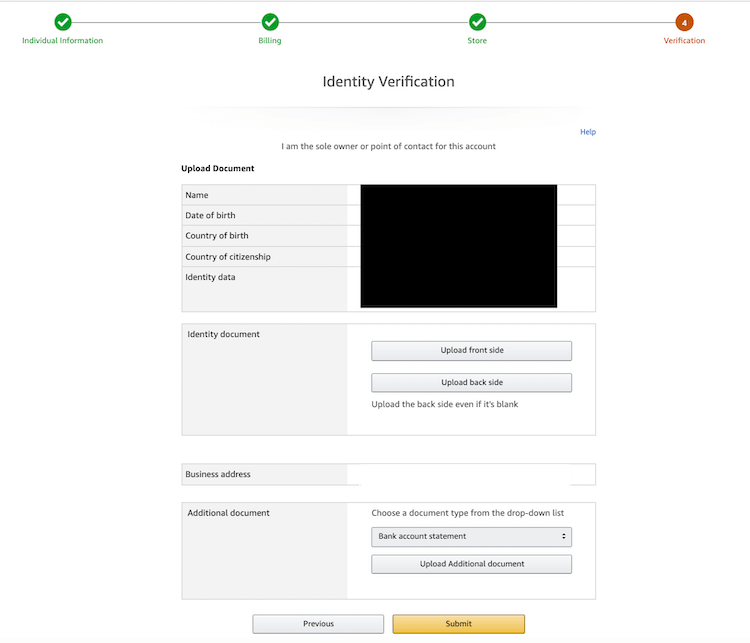
It would be best if you verified your identity by uploading images of your ID (license or passport) and a bank statement and, after uploading them, click submit. Later on, verify the business address you gave previously and click on the confirm button.

If you entered the correct address, you would receive a postcard and a verification code for your Amazon seller account login. When you get the postcard, “Enter code” and click “Next” to finish the verification process. Now log into https://sellercentral.amazon.com to start your journey as an Amazon seller.

What Is The Benefit Of the Amazon Seller App For Amazon Seller Account Holders?
Install the Amazon seller app on your phone use Amazon seller central login to open your Amazon business account on your phone. With your Amazon seller central account, you can track sales, fulfil orders, answer queries of your customers, find products to sell, capture and edit professional-quality photos and create listings from your phone.
How To Change Country in Amazon App?
Amazon sellers log into their my Amazon seller account, manage their content and devices, click on preferences, click on change under country settings, enter their address, and click on update.
How To Create Multiple Amazon Buyer Accounts?
You can create multiple Amazon buyer accounts but only set up an Amazon seller account for one region. But if you have a legitimate business, you can create various Amazon buyer accounts and maintain all of them. But, first create only one Amazon seller account, learn to manage it, then think of creating multiple seller accounts.
How To Proceed Further After Amazon Seller Central Account Setup?
Opening your Amazon store is not difficult; afterwards, we are here to help you manage your Amazon prime business account. We will handle SEO, account performance, inventory, marketing services, buy boxes, maximize pricing and profits, sourcing and maximize your brand. Directly reach out to us on WhatsApp, so we can facilitate you in managing your account.
